

Project:Intercity is one of those series of pictures which has been nagging away at me for a while; after an initial concept pic a fair few years ago, then a wider series about 2-3 years back, the project was put on hold awaiting a proper place to shoot it, enough props to make more complex scenes, and the time to do a complex set-up...
The basic concept, such as it is, is to capture something of the atmosphere of late-night train journeys I made to and from Uni, waiting in the cold, bleary-eyed, at Carlisle, Wolvo, Stafford, and similar wind-swept stations. Travelling late at night was a good way to get home and back on the cheap, though it meant often long waits for connections. But there is something fascinating about night-time rail journeys, particularly on cold, clear nights... Trains racing through the station, vending-machine cups of tea or hip-flasks of rum to keep the chill out, then ending up being sat on near-deserted services rushing past blurred lights and houses, towerblocks and skyscrapers.
Finally, just before this summer, I got a chance to block-out a couple of weeks to do a shoot which I hoped would allow me to finally do the project justice, and planned a few set-ups so I could try a few ideas out for a much larger shoot later in the year. The idea was to have several sets of work come out of this; firstly, the actual process of miniature construction to document on the Model Making Blog, then two sets of stills shots (one along the track, one from the lineside), and finally, a stop-motion film made from the long exposure pictures.
Apologies in advance; given the size of the project this is going to be a stupidly detailed series of posts, as I still haven't revamped the Model Making Blog...
The Early Test Shots

What prompted all this renewal of effort, is that I ended up re-using some of the concept tests for an exhibition last year. With the project having been put on hold for a while to make way for other work, showing the pics rekindled my interest in it, so I decided to not just re-shoot these concept images, but more besides, creating the full set with many different, varied scenes such as city stations, goods yards, suburban streets, viaducts between skyscrapers, and so on.
The Camera Dolly

The first set of images was shot about 6-7 years back with my Canon 350, because it was lightweight. When the second set were done it was with the D90 which coped better from a technical point of view but was heavier and hard to balance without it tipping over, but this new set would be with the new D7200 for the best possible technical results I could get with our equipment.
The problem was that the camera dolly couldn't really support the weight; it had been built as something of a bodge, on an old Triang Big-Big Trains gondola wagon. But with it being a bogie wagon, it wobbled around a bit, which caused some blurring of the pictures. A new-build would have to be more robust, but also built on a shorter, more rigid chassis.
Not only that, but to create a short stop-motion film from the long-exposure pictures, the only way to ensure the shots worked as a sequence would be to motorise the camera dolly too...

So plan one; I bought a very old Lima 4F locomotive cheaply from eBay. And because you get what you pay for with 1960's Lima, it was a bit naff. I'd also ended up buying a very early battery (rather than mains) powered example, so no variable speed control, because the plan at this stage was to use the Triang Big Big plastic track, which I had a fair bit of (bigger setups for these shoots meant that buying proper 0 gauge track which could run from an external powered source would be prohibitively expensive).

I cut a hole in the tender chassis to accommodate a tripod baseplate, and a simple block of wood was glued on to chock up the lens. Simple, but kept the lens centred along the track.

The chassis ran pretty poorly though, which I gathered was par for the course, though this one got worse and then stopped altogether.
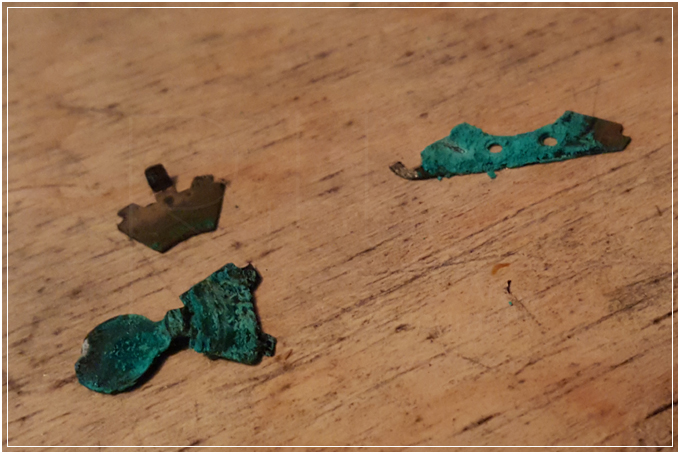
Subsequent dismantling revealed why; the very fluffiest of electrical connectors.

Much bodging later, and a powered chassis resulted. And frankly failed to move anything. Even with extra weight, it barely moved itself then promptly burned the motor out.

This pic shows the three subsequent attempts to remedy the situation. I realised that using the Triang plastic track was going to be an economy too far... if I wanted control, I was going to have to use metal track. This opened up the options a bit with chassis, but within reason; decent 0 gauge chassis are available, but expensive. I bought instead a Lima 4-wheel diesel shunter, which was something I'd actually always wanted when I was little and had a second-hand Lima catalogue. Unfortunately, it wasn't powerful enough. But I managed to acquire a cheap second power bogie, but it still wasn't enough to shift the camera with them operating in tandem.
Seen upside down in the pic is the successful final option; an Atlas Switcher. This thing is a solid brick of metal with a decent motor and could probably tow me on a wagon, let alone a camera.

I was having problems with the tender chassis for the camera though; it was too high, so the camera was unstable and wobbled around. The remedy was to buy a Lima 0 gauge brakevan and use the lower chassis, which was very structurally sound with those running boards along the side, which dropped the camera down about 5mm to a more manageable level and stopped it overbalancing quite so much.
Also note the lighting to represent the loco headlamps (something not entirely successfully done with a torch on the practise shoots); Poundland Christmas tree lights this time around...

And thus the final camera dolly. After some trials, the lighting was enhanced with overhead lights on a length of stripwood on a spare clip for the hot-shoe mount...
Rolling Stock
This having been a project I've been working on for so long, I've been gradually hoarding suitable trains and part-donors for the last few years. Some of it is leftover from the Britannia Model Village project a decade ago, with bits from cheapie shops, charity shops, and eBay bargains.

Laying it all out, to see what I had available, showed some shortages... the Triang Big Big carriages provided some nicely 'modern' looking rolling stock, but I didn't have much in the way of goods vehicles and next to no locomotives I could use in a modern setting for the photographs. On top of that, because I wanted to be able to resell a lot of this stuff to recoup on my budget, I was wary of repainting or modifying a lot of the stock at this stage.

Immediately prior to the shoot and some more bits had been acquired, and some customisation of the cheaper bits carried out.

I broke my rule with the Triang Big Big stock, though the two Continental carriage bodies I chose to hack and chop were both a bit battered. Drilling, cutting, and filing the ends to create a vaguely modern looking DMU...

...though I'd also acquired this. I got a big box of what is known as 'custom bait' Triang carriages, which included these part-rebuilt carriages which were underway as DMU or EMU vehicles. There were also some nice BR blue and grey liveried carriages in the correct shades of paint, and a ton of spare parts to create more varied vehicles if needs be. In the end, the time it would have taken to finish this off for this shoot proved prohibitive, but the repainted carriages made useful background items.
The Track
With the decision taken to properly propel the camera dolly with a motorised chassis (to control the speed for the long-exposure film), I needed to acquire some suitable track. Lima to the rescue again, and a lucky eBay purchase of a job lot of old track saw enough to be going along with. Being as I was planning on having varying set-ups for each shot, having 'train set' track which could be dismantled and easily set up again and again (rather than long lengths of flexible track) seemed to be the better way to go.

Testing the track geometry with the varying components; three points and a diamond crossing, which would allow for some suitably complex-looking set ups.

Clearance testing with the camera dolly.

It did raise a significant problem though... the Triang stock (of which I had been planning on using for the project) doesn't agree with the Lima track. The wheels are too deep, and a look online for replacement wheels showed it would cost more to buy the replacement wheelsets than it had done to buy all the carriages in the first place... More shopping would be in order if I wanted any of the other trains to actually move in the pics, particularly with the planned short film.
The Set
%2Bcopy.jpg)
Last time I shot this project I worked on the kitchen floor in one mad, long, long, very long night, as seen above. Apart from the fact my dodgy chest and knees aren't up to all that grovelling around on the floor any more, it really limited the size of space I had available.

This is the cellar at the in-laws which I occasionally take over to use as a workshop (the Jabberwock sculpture was built mainly in there), and I figured if I found a way to black it out, then I could shoot during the day. No need to dismantle the set, more time for the shoots, and using the stone table, a more comfortable working height. The stone table was a bit uneven, so I assembled some simple framed boards which could be bolted together with coach bolts, resting on a sub-frame, which also bought me an extra foot width on each side. On each end were added smaller boards on trestles for the video shoot, to accommodate the railway lines disappearing off-scene into tunnels and the like.
Also shown in the above picture are the three Lima carriages I purchased so I could have a smoothly moving train (smaller wheel flanges, so no bumping over the rails even if the carriages were of an older design than the more modern Triang ones). The three carriages wouldn't be repainted as I wanted to resell them afterwards, but it was still cheaper than just buying replacement wheelsets for the Triang ones.

An experiment in how to do the tunnels... I spent ages trying to work this one out, until I realised that using the shelves from a dismantled bookcase and a sheet of folded-over card did the trick.
Buildings

I was always quite proud of how my cheapie skyscrapers came out in the earlier pictures, using the discarded food-packing crates from a previous job. The above pic shows a development I did for a shoot last year, making a tower block from a folding stacking crate by gluing it together, adding bits of card here and there to disguise the gaps, and strategically repainting. I'd actually bought a load more of these crates to store the rest of the props in, and decided to not repaint them but to make the most of the various colours available to add a bit of variety in the shots.


Something improvised on the spur of the moment, I spotted these in Poundland one morning whilst building the set, and thought that with very little modification they'd make decent platform shelters.

Blacking-out the cellar took a couple of days; as many black sheets and backdrop cloths as I could find, and a variety of washing line poles, pegs, string, and clamps...

But this was the effect- the joins between the sheets, held closed with pegs, would allow access to the set for putting the buildings up.

This shows the effect with one of the later shoots... OK so a bit of a bodge, but it did the trick.
So with all that prep done, after a couple of weeks of getting everything together, building the set, and sorting out the models, it was time to get shooting...
No comments:
Post a Comment